Showing posts with label magnet wire. Show all posts

Sunday, 16 December 2012

A turn around the secondary coil. Again.

Hi everybody, not done a post for ages. Been busy with a bit of decorating and think I have not been looking forward to re-doing the secondary coil so have kept putting it off. I think it's time to finish the secondary so I can get on with testing and finally fire up this monster. Plus I think I need to move the Tesla to a safer area, at the moment it's in our freshly decorated living room which used to be pretty safe place where it wouldn't get damaged. Not anymore! Sadly we lost our old cat, Coco, a couple of months back but acquired 2 little rescue kittens, Milo and Lulu. They are mad. I haven't yet worked out if Perspex is claw proof and my Tesla looks like the worlds biggest scratching post.


If you want to see Milo and Lulu live take a gander at http://cats.damow.net from 10am till 4pm weekdays or anytime after 11pm any day. Live webcam of our kitchen (cats bedroom).

Anyway on with the Tesla. I have finalised the design for the windings on the secondary coil. The goal was to reduce the number of turns and this was achieved by increasing the diameter of the magnet wire on the secondary and reducing the length of the windings. I used JAVATC to generate the figures I needed.

With 1050 turns on the secondary resonance should be achieved by tapping the primary coil at turn number 11. The predicted resonant frequency is just over 180kHz and can be seen in the data below.


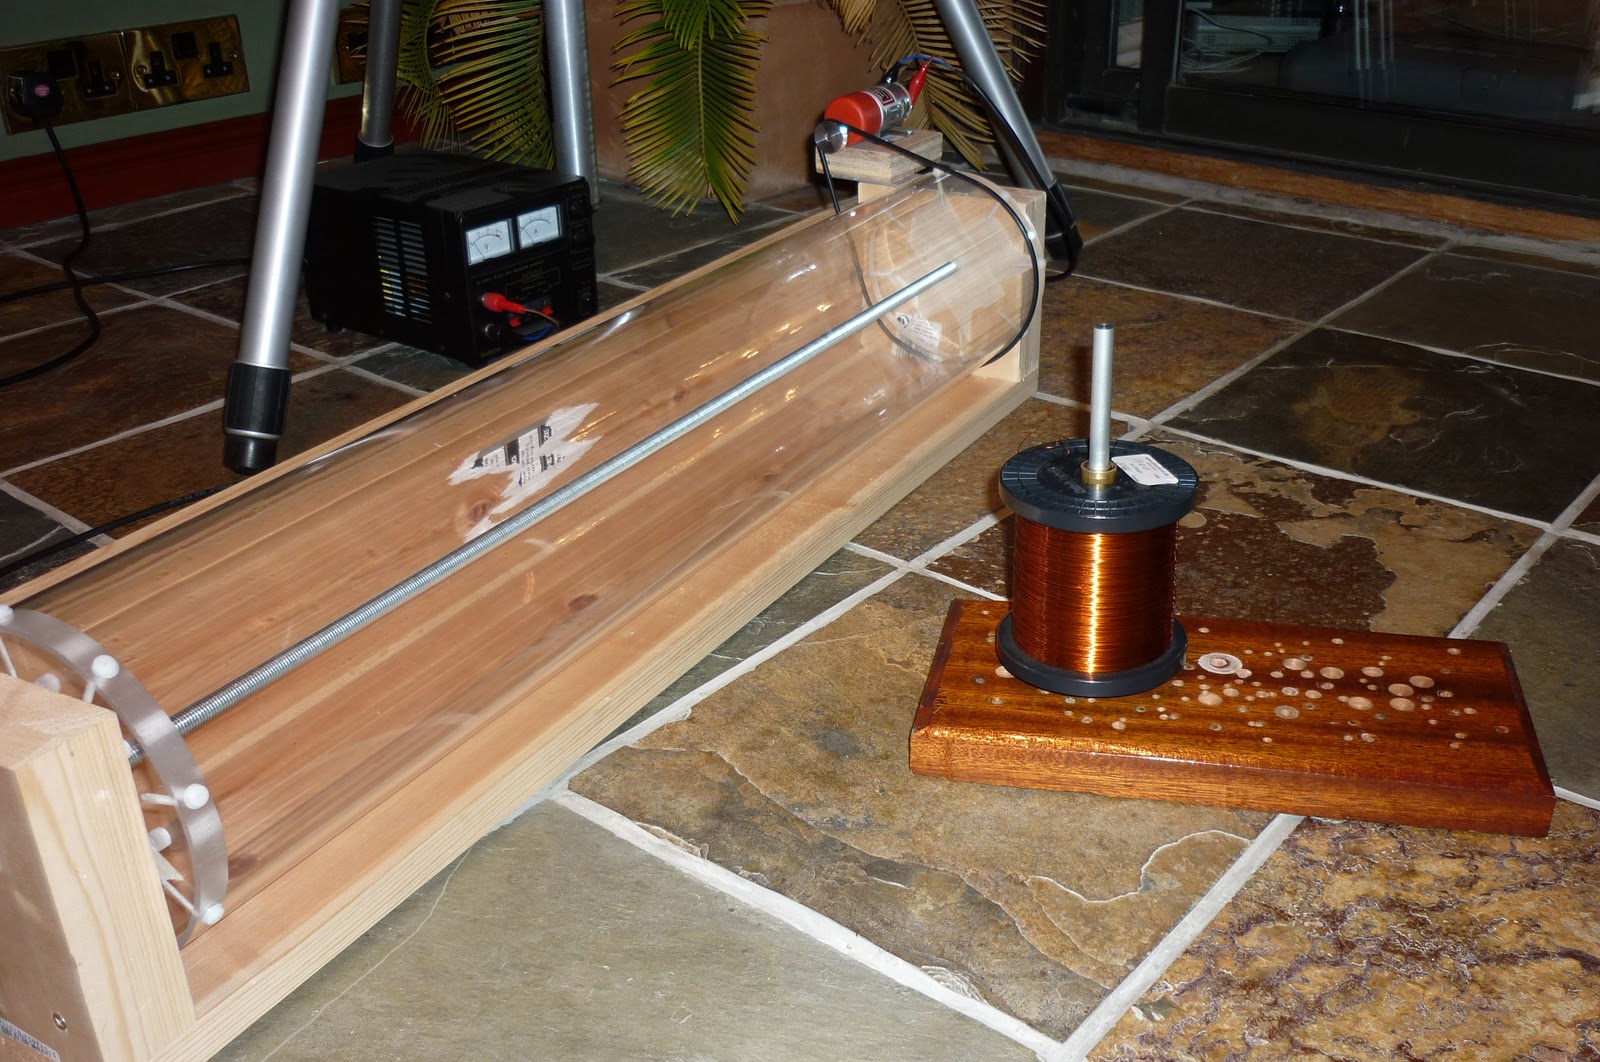
The new secondary coil blank is installed on my trusty winding jig. So glad I decided not to sell the jig on eBay after completing the first doomed secondary.


I made a small change to the winding jig. I replaced the original 148:1 motor/gearbox with a 50:1 unit. This should speed up the winding process, last time it took over 3 hours. The motor/gearbox units are produced by MFA and can be obtained from Maplin in a variety of ratios.


I have already purchased a few bottles of varnish to coat the coil after the windings are done. I am using the same as last time, it's made by a company called AEV (Advanced Electrical Varnishes) and is known as Ultimeg 2000/372 a high build Alkyd air drying anti-tracking varnish. The easiest place to get it is from Brocott on eBay but it's expensive in small amounts (£4.50 for 100ml plus p+p). You can also buy it from Hi-Wire Ltd for about £28 plus p+p but the smallest qty is 5 litres.

If you like this blog you can show your support by one or all of these. 1. +1 my blog and email it to a friend. 2. Follow me.... It's good to know someones interested. 3. Leave a comment.... All are appreciated.

Sunday, 16 October 2011

Winding the Secondary Coil

Now that the toroid has finally arrived I am keen to finish off the secondary coil so I can progress on to the primary. The next step is to wind the secondary. The windings will be as per the instructions, 26awg wire which is 0.40mm diameter. When measured with my verniers I get an average of 0.44mm which (I presume) is due to the insulating varnish coating on the wire. The wire will be wound onto my 6" perspex form which measures 810mm. The windings will be 28" high centred on the perspex tube. I will be using my recently upgraded (now motorized) winding jig.
Above you can see the coil former fitted on to the jig. I calculated that there would be just over 1600 turns on the coil each single turn being 471mm (150mm X 3.141) so a total length of 753 metres of wire!
   The winding jig is geared to turn at 15rpm running at a maximum 12 volts so 1600 turns would take 106 minutes minimum.
I started the winding by passing the wire through 3 tiny holes, first in then out then back inside the former, leaving about 6" inside to work with. With the motor running I started to lay down the first few turns. I used my left hand to guide the wire onto the form and a finger nail on my right hand to keep the coils pushed up against each other (if needed). I soon realised that 15rpm was a little fast and backed the bench supply back to 10 volts. Also this is definitely easier as 2 person job. I needed my son (Damien) to help make alterations to rpm, stop and start the jig when the turnings accidently overlap, reposition the feed spool and countless other help during what turned out to be 3 hours of boredom occasionally broken up with moments of intense panic.
The pic above shows the finger nail guide technique which proved to be quite successful. In my left hand you can see a piece of material which I used to create a bit of tension on the wire.
It's best to feed the wire onto the coil slightly behind the present position on the former. This means the last coil on the tube helps guide on the next turn.
Here's a quick video that shows a little of the winding process. Sorry about the annoying noise the winding jig makes. We had to listen to it for 3 hours so think yourself lucky!
We have done a longer video which Damien is going to process and convert into a time lapse. We will post it to youtube and stick a link in here when it's done.


Three hours later and the coil was finished. Could help sticking it in place with the toroid just to get an idea of the finished TC.
Damien's arty shot. We are about to decorate so no comments on the pink flowery wall paper please.

If you like this blog you can show your support by one or all of these.

1. Click on some ads shown on this blog.... I get paid for that.
2. Follow me.... It's good to know someones interested.
3. Leave a comment.... All are appreciated.