The first job I had to do was to construct a rectangular copper plate that I will use as the bottom electrical contact to the secondary coil. It provides a very large area for electrical connection rather than just a small point of attachment. I thought it best to produce this plate first so I could confirm that the starting and finishing points for the winding were appropriate. I found a nice piece of copper sheet in my stock which was perfect.
These are the winding figures I planned to work to.
Length of turnings =1050*0.64
=67.2
Total form length =80cm
Windless portion =12.8cm
Windless portion bottom =4cm
Windless portion top =8.8cm
As you can see I have 4cm from the bottom of the coil form to the start of the windings. This is the gap that the copper plate will sit in. Here's the diagram from Stefan's page.
A good size for the plate was 70mm by 23mm so I masked up the piece of copper and marked up the dimension. Then, using a pair of 6" tin snips, I cut out the copper plate.
The corners of the rectangle need to be rounded so I nipped them off with the tin snips and finished them off with a flat file.
The copper sheet was quite thin and so very easy to work. My coil form is already fitted on my coil winding jig. I placed a piece of masking tape 4cm from the base to represent where the windings would start. This helped me choose the initial dimensions of the copper plate.
This plate will eventually be bonded to the coil form using 2 part epoxy so it needed to be bent gently to match the curvature of the coil form.
Above is the finished plate in its approximate final position. Next job is to wind the coil. I am guessing that will be a 2 hour job so maybe I'll tackle that one evening next week.
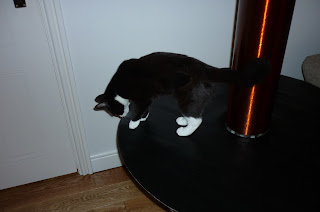
One last thing. The kittens are driving me mad as they now use my Tesla coil as a shortcut from the settee to the living room door. So a trip to Bury Market to get some black vinyl material and a bit of trimming with scissors and we have the Tesla kitten guard.
 |
| Kitten Guard |
 |
| Patent Pending |
 |
| Lulu |
If you like this blog you can show your support by one or all of these. 1. +1 my blog and email it to a friend. 2. Follow me.... It's good to know someones interested. 3. Leave a comment.... All are appreciated.


No comments:
Post a Comment